Job Composer
- The Job Composer allows you to manage Slurm jobs without needing to use the command line,
providing a built-in text editor for your SBATCH scripts and easy access to output files.
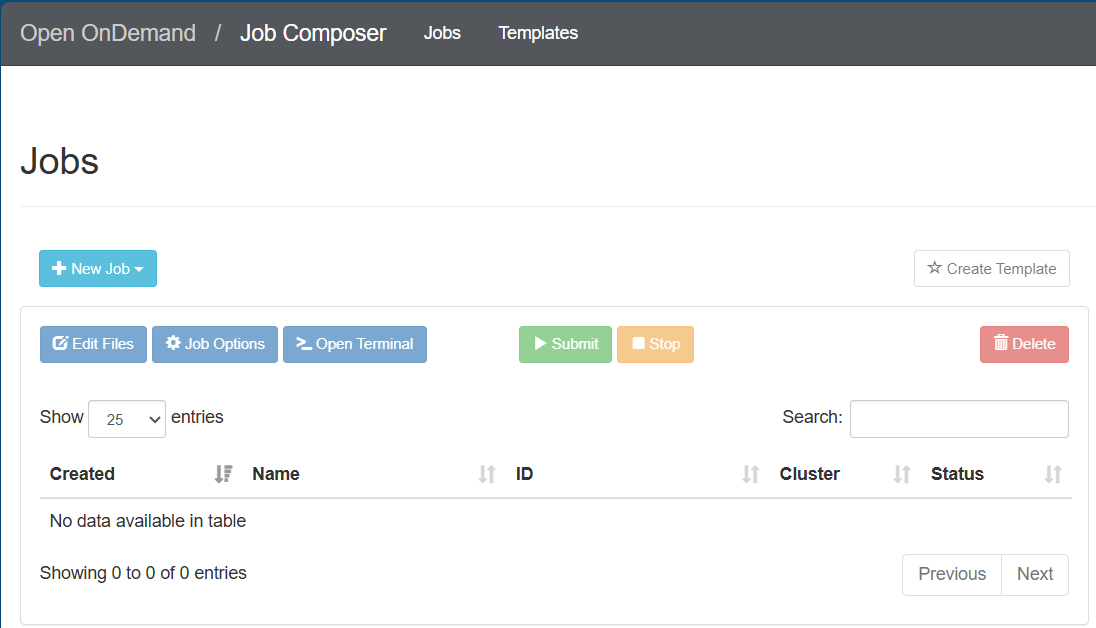
To create jobs through Open OnDemand, navigate to Jobs > Jobs Composer from the dashboard.

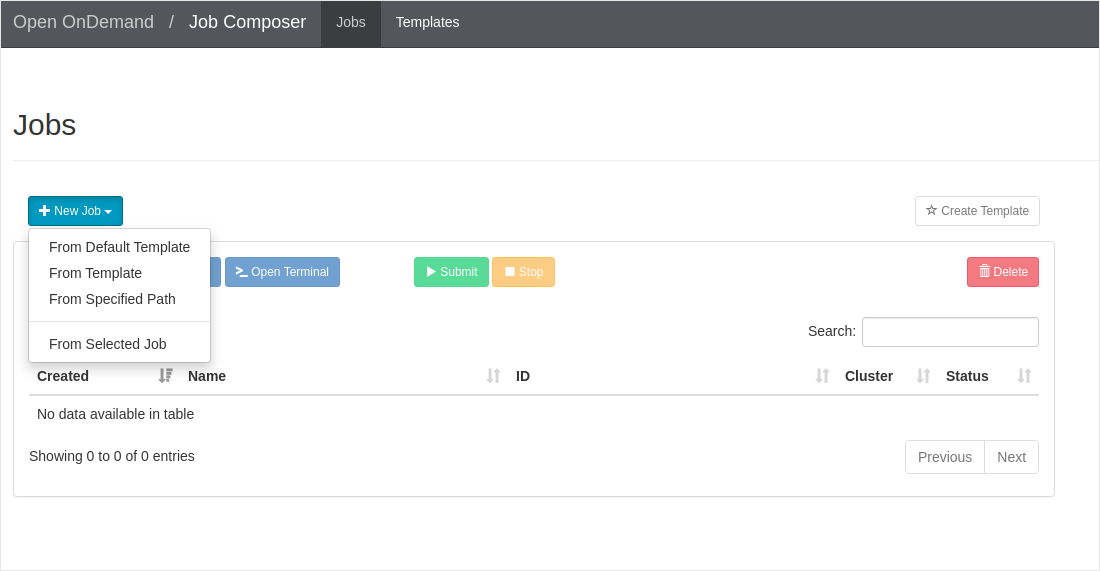
You will see the below output opened in a new tab. The list of options available to create new jobs are: From Default Template, From Template, From Specified Path, and From Selected Job.
Create Job
From Default Template
On the Job Composer page, select New Job > From Default Template.
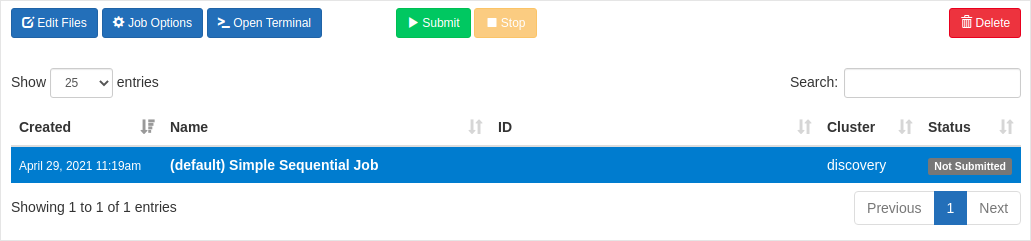
A new job will be created like below.
You can modify the options of the created job like name, Cluster, Job Script using the Job Options button.
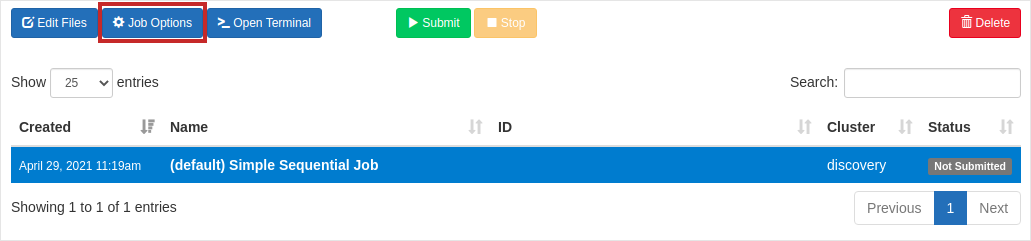
After you click the button, you can change the job options like below:
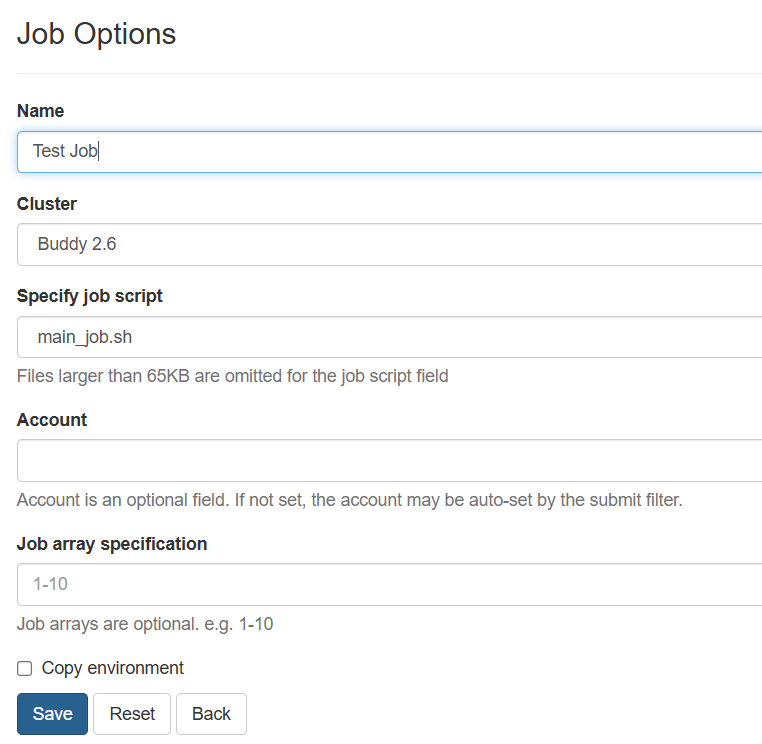
In the above example, the Name has been changed from default (Simple Sequential Job) to TestJob. After the name has been modified, hit the Save button and the modified job name will be replicated in the Job Composer page.
Output:

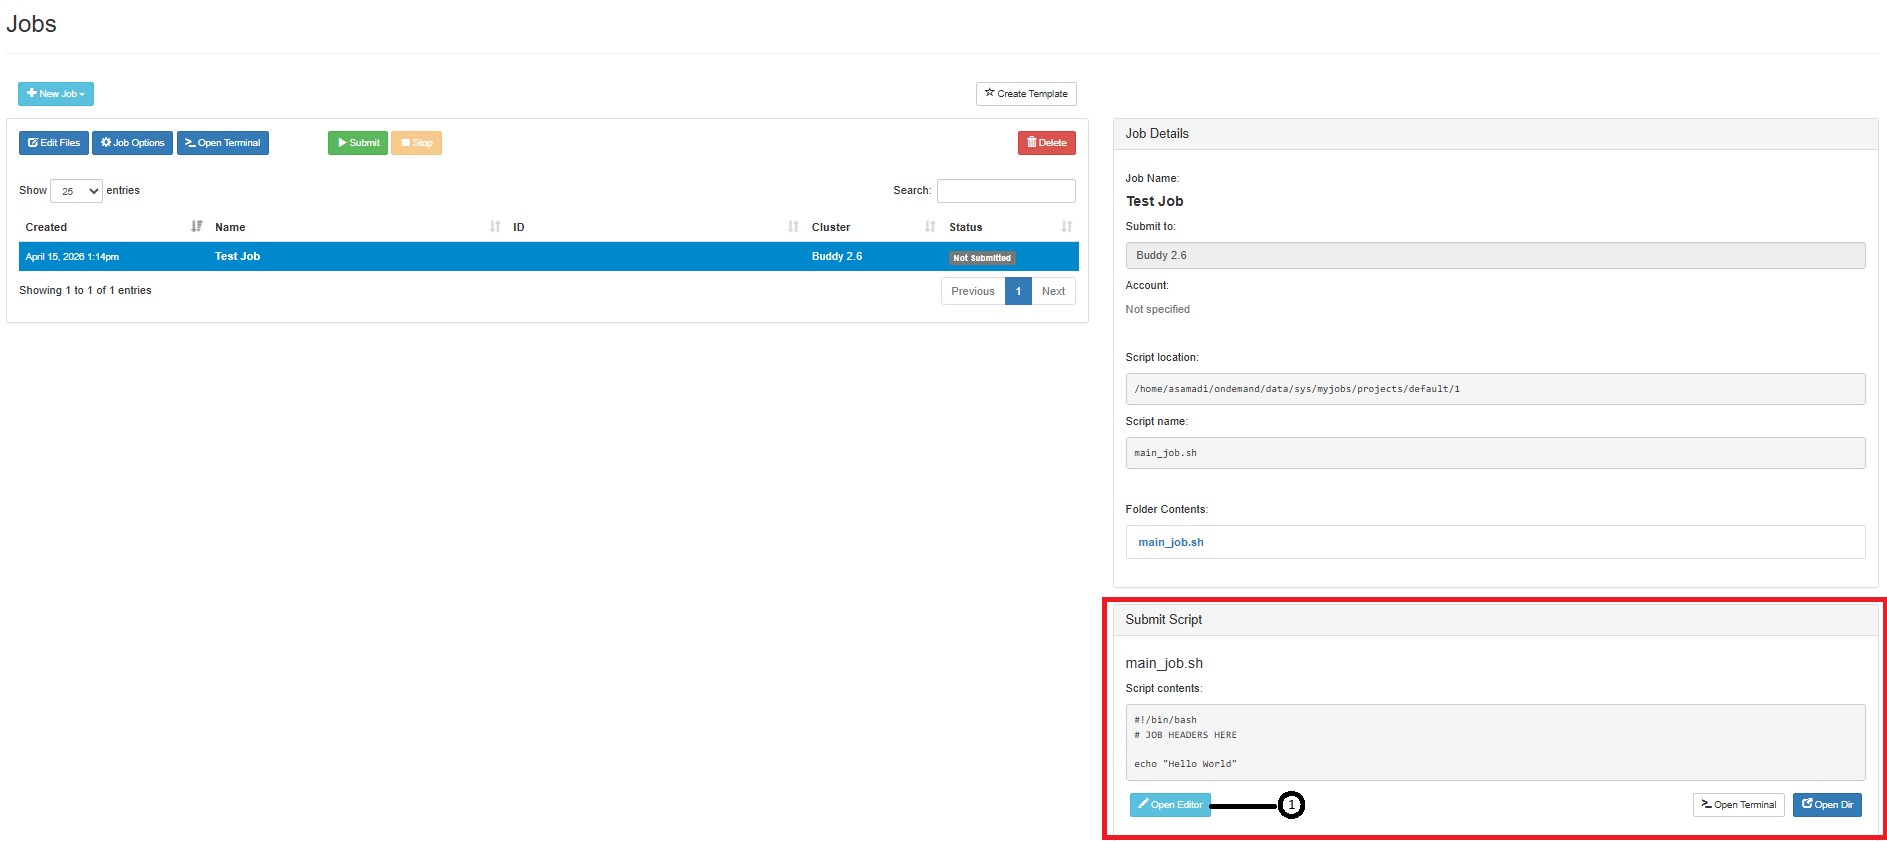
Now, modify the submit script
main_job.sh.On the Job Composer page, hit the Open Editor button under Submit Script section.
In the text editor opening in a new tab, modify the Job Script with the below content.
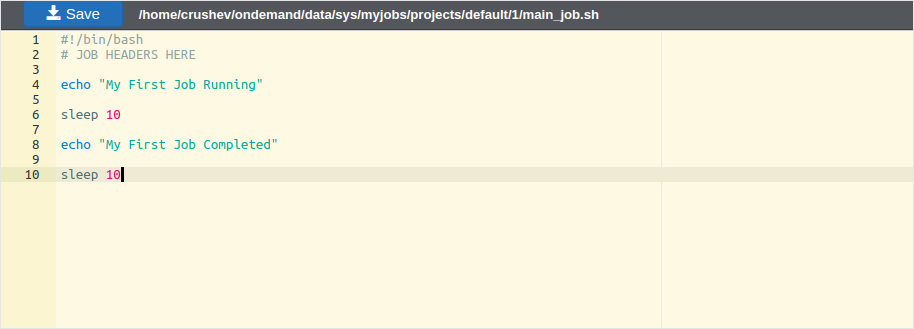
After the job submission script
main_job.shhas been updated, hit the Save button. Go back to the previous tab to see the updated script.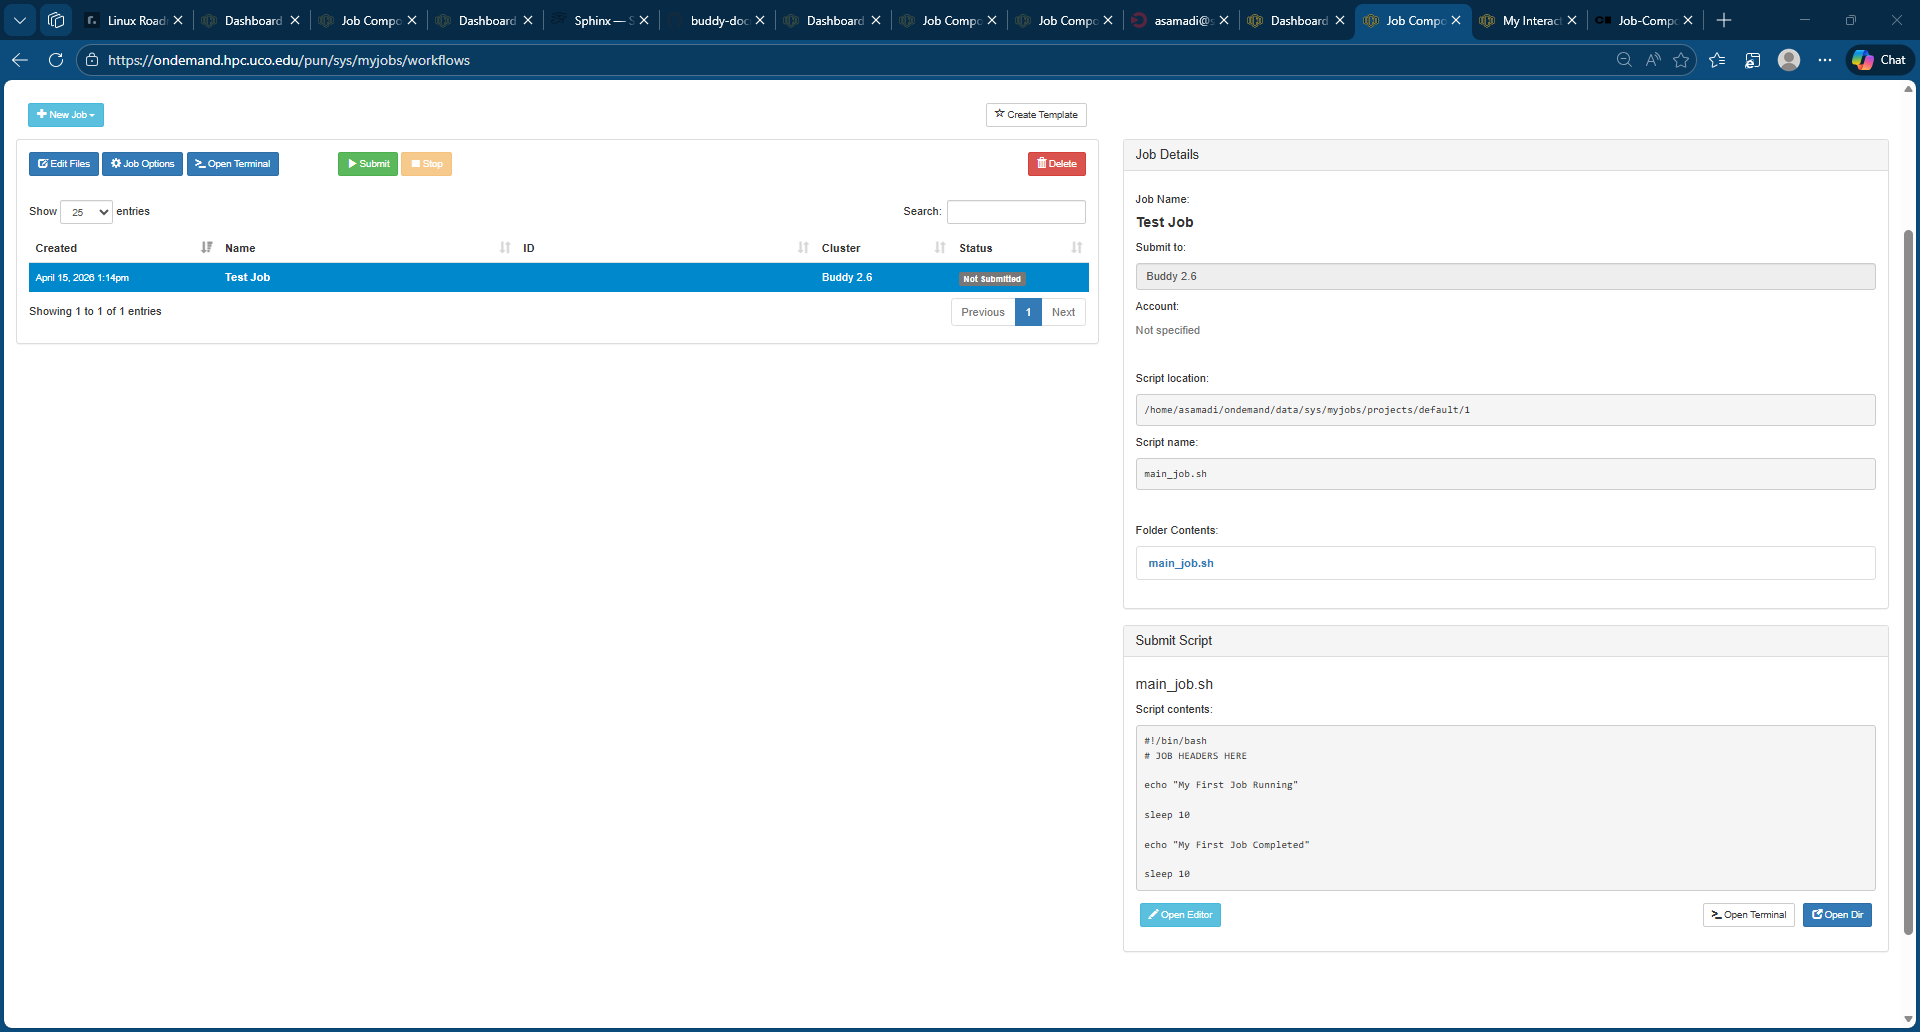
The Job Details pane also shows important information related to the job.
Note
If you want to open the submit script file directly in the terminal, use the Open Terminal button. Open Dir will open the directory in the file manager.
Now, hit the Submit button. The status will change from Not Submitted to Queued or Running. You will see a success message alert at the top of your page. The status will change to Completed once finished.

To view the output, click the generated output file
slurm-<job-id>.outunder Folder contents in the Job Details section.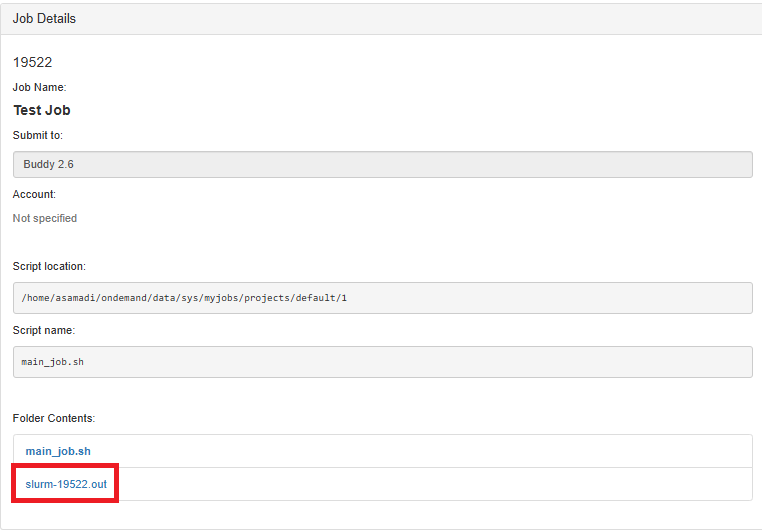
Output (slurm-<job-id>.out):

From Template
Instead of retyping the Slurm attributes and job parameters for your new job, you can create a custom template and use as a basis for your future jobs. It also saves time. Also, it’s easier and faster to create a custom template in Open OnDemand. Follow the below steps to create a custom template and compose job from that template.
First, create a directory called
custom_templateunder your home directory.mkdir custom_templateCreate the following files,
input.txtandscript.shunder thecustom_templatedirectory.input.txt:
Ubuntu,apt
Debian,apt
CentOS,yum
Arch Linux,pacman
Fedora,dnf
script.sh:
#!/bin/bash
#SBATCH --job-name=template_test

while IFS= read -r line; do
   if [[ "$line" == *"apt"* ]]; then
      printf '%s\n' "$line"
    fi
done < input.txt
The bash script script.sh will read the input file line by line and if it finds a line that has the string apt, then, it will print the line.
The custom template is ready and available under the path <home>/<your-username>/custom_template. Now, using Open OnDemand, you can create a template.
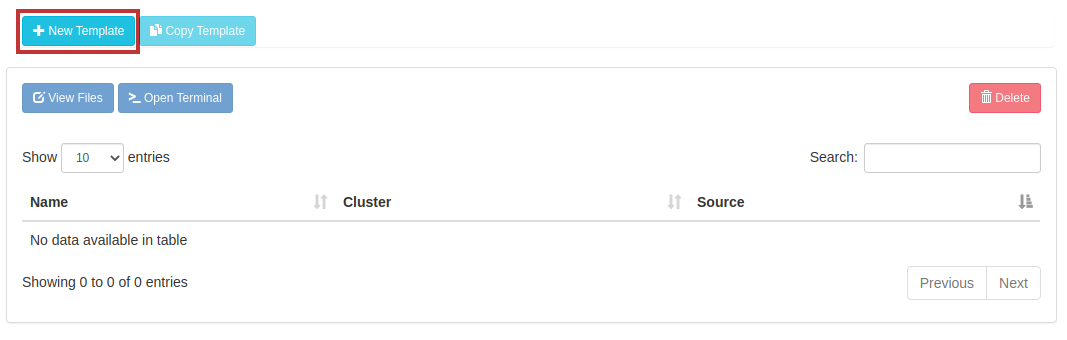
Go to Jobs > Jobs Composer from the dashboard. Select the templates tab.

Select New Template from the Templates page.
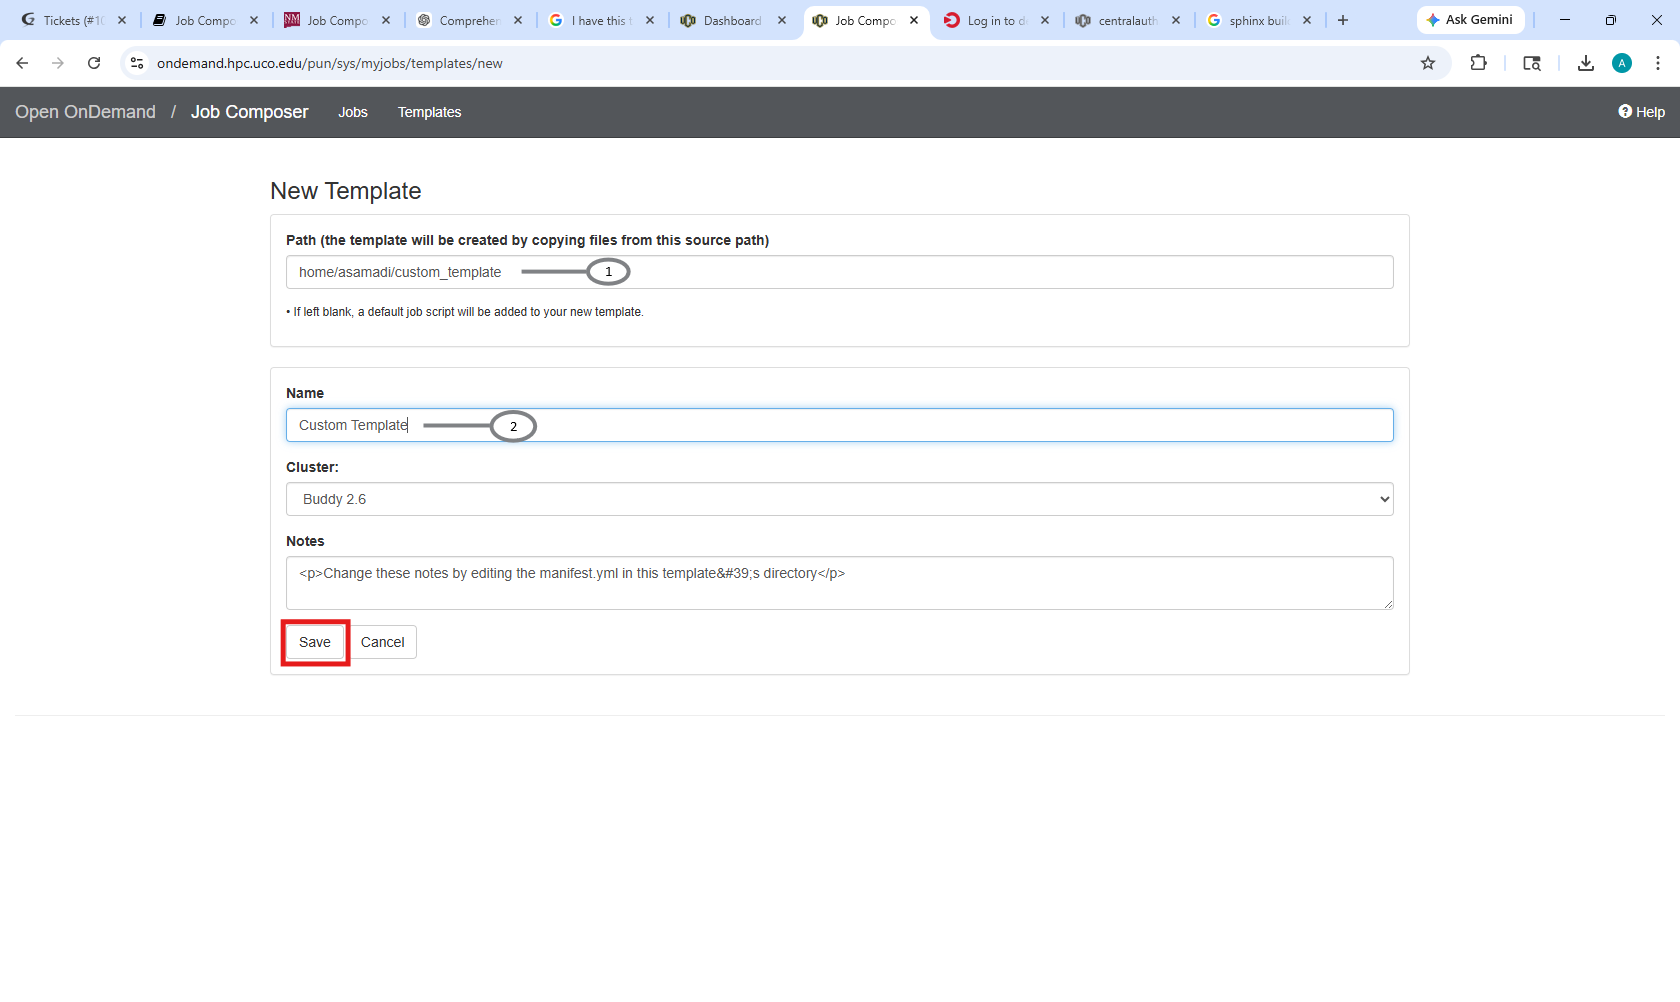
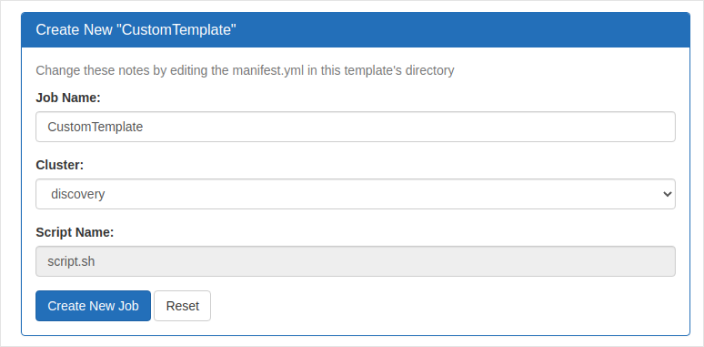
Now, you can enter the values for the custom template. Enter the path and name to the template and hit the Save button.
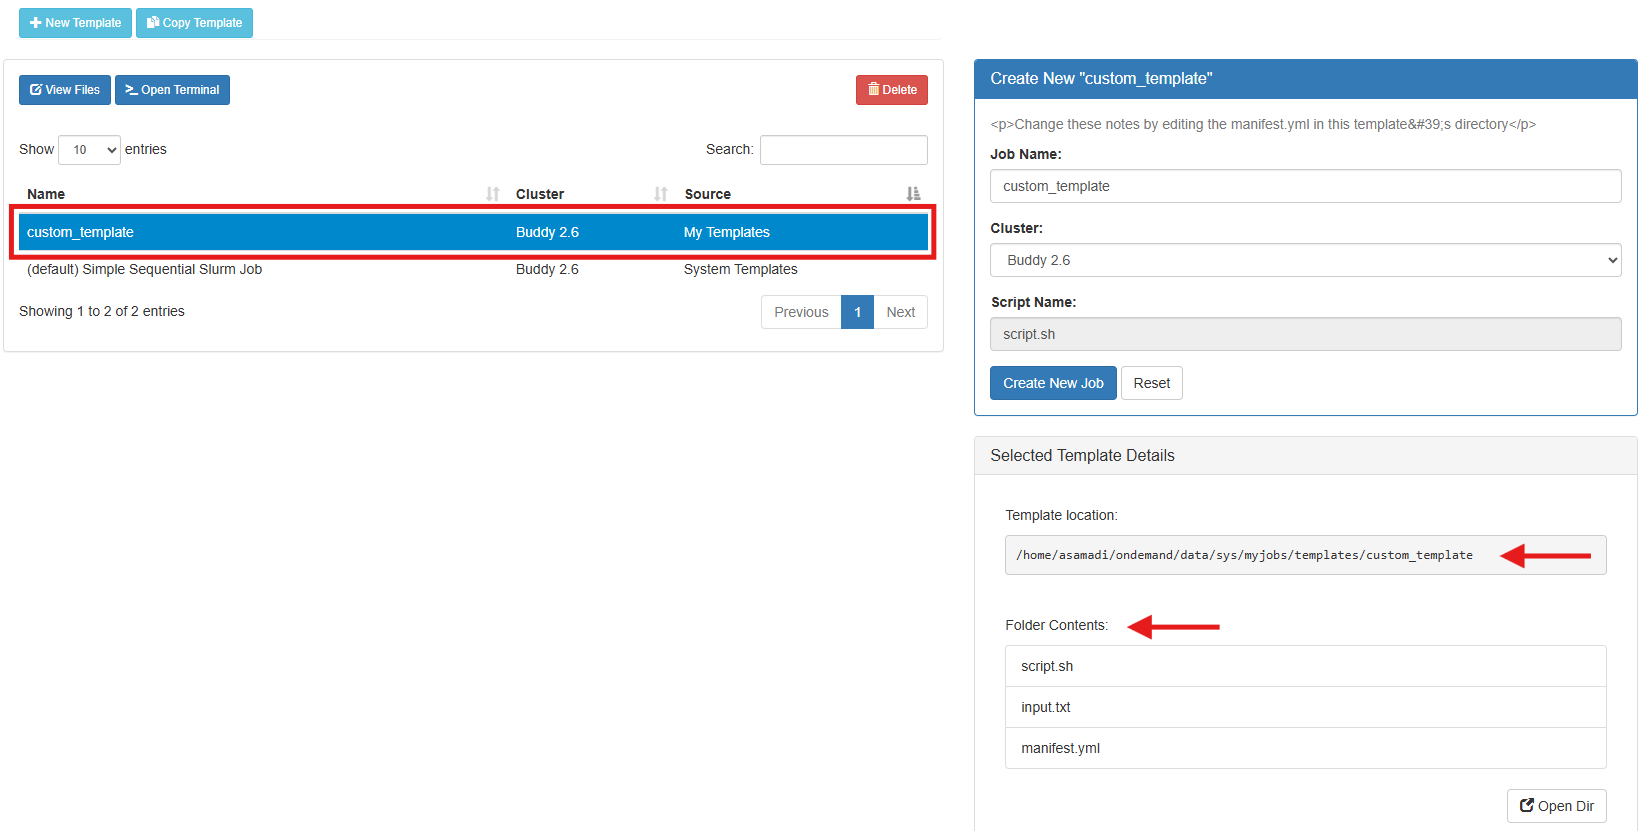
You will see the template has been successfully created. You should see an output similar to the one below.
The Job Details pane also shows important information related to the job.
Note
If you want to open the submit script file directly in the terminal, use the Open Terminal button. Open Dir will open the directory in the file manager.
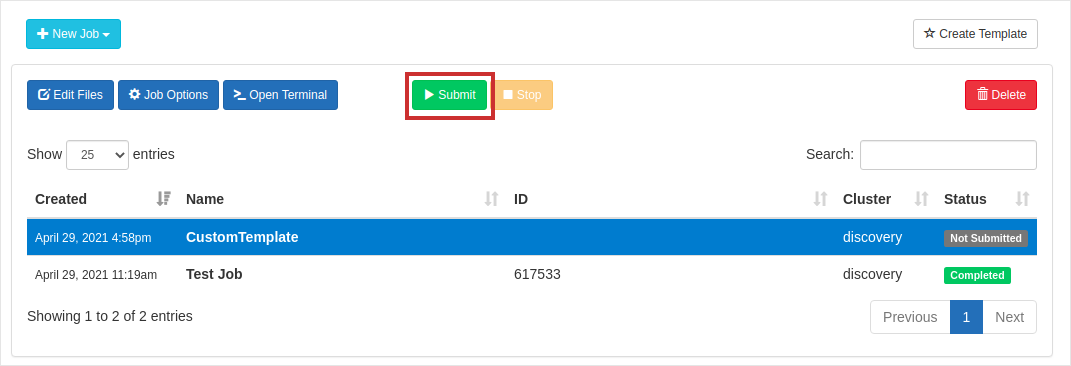
Now, you can create a job from the template. Select the Create New Job button from the Templates page. A new job will be created using the custom template and you will be automatically redirected to the Jobs page
Submit the job by clicking Submit button and you will the status change from Not Submitted to Queued or Running. You will also see a success alert for the job submission at the top of your page.
After the status changes to completed which indicates that the job has finished, select the output file slurm-<job-id>. out under the folder contents section on the right pane of the window.
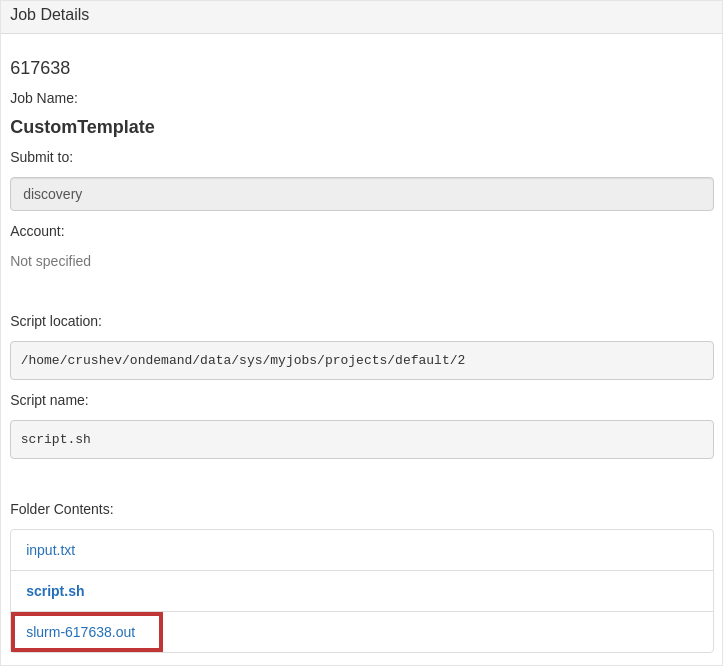
Output(slurm-<job-id>.out):

From Specified Path
Creating jobs from Specified Path is one of the simplest ways of creating a job but there are things you need to take note of.
Note
If you want to open the submit script file directly in the terminal, use the Open Terminal button. Open Dir will open the directory in the file manager.
Warning
If you have a submission script called script.sh in your home directory and you specify path as home/<your-username>, it will cause all the content such as files and sub directories in the home directory to be copied under the new workspace which is a bad and space overkill. It’s recommended to create a directory and place all the necessary scripts under that directory and specify it as a source path for your jobs.
First, create a directory called test under your home directory.
mkdir test
Create the following files, script.py, script.sh under test directory.
script.sh:
#!/bin/bash

#SBATCH --job-name=maxFib      ## Name of the job
#SBATCH --output=maxFib.out    ## Output file
#SBATCH --time=0-00:10:00      ## Job Duration
#SBATCH --ntasks=1             ## Number of tasks (analyses) to run
#SBATCH --cpus-per-task=1      ## The number of threads the code will use
#SBATCH --mem-per-cpu=100M     ## Real memory(MB) per CPU required by the job.

## Load the python interpreter
module load python

## Execute the python script and pass the argument/input '90'
srun --export=ALL python script.py 90
script.py:
import sys
import os

if len(sys.argv) != 2:
   print('Usage: %s MAXIMUM' % (os.path.basename(sys.argv[0])))
   sys.exit(1)

maximum = int(sys.argv[1])

n1 = 1
n2 = 1

while n2 <= maximum:
   n1, n2 = n2, n1 + n2

print('The greatest Fibonacci number up to %d is %d' % (maximum, n1))
Important
If you have a close look at the submit script script.sh, it has –export=ALL flag in the srun command. The flag is mandatory if you want to submit and run jobs to the Discovery cluster through Open OnDemand.
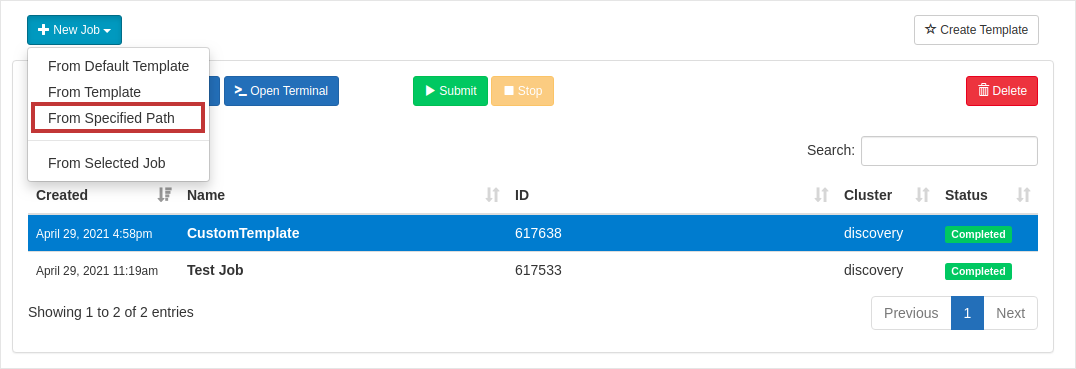
Now, navigate to Jobs > Job Composer. Select New Job > From Specified Path.
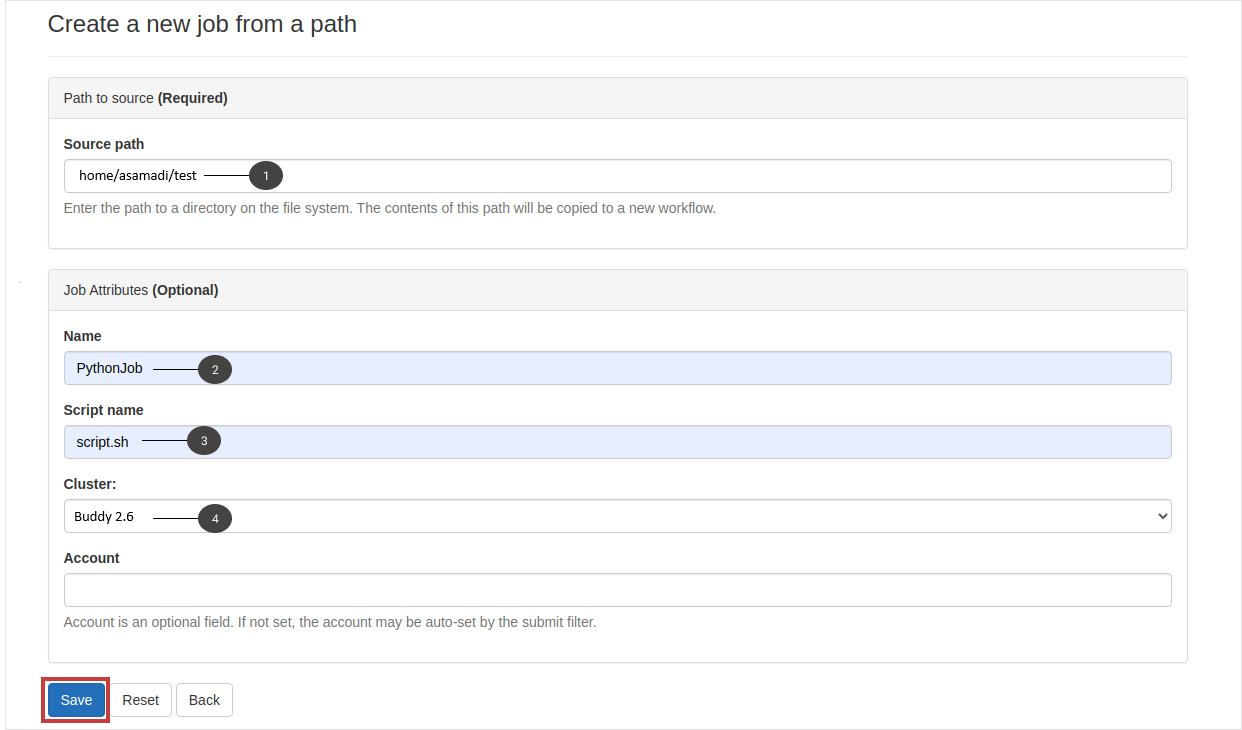
Enter the source path to test directory and give a name for the job as PythonJob. Also, give a name for the submission script as script.sh and specify the cluster name as Discovery. Hit Save button after setting all the job options.
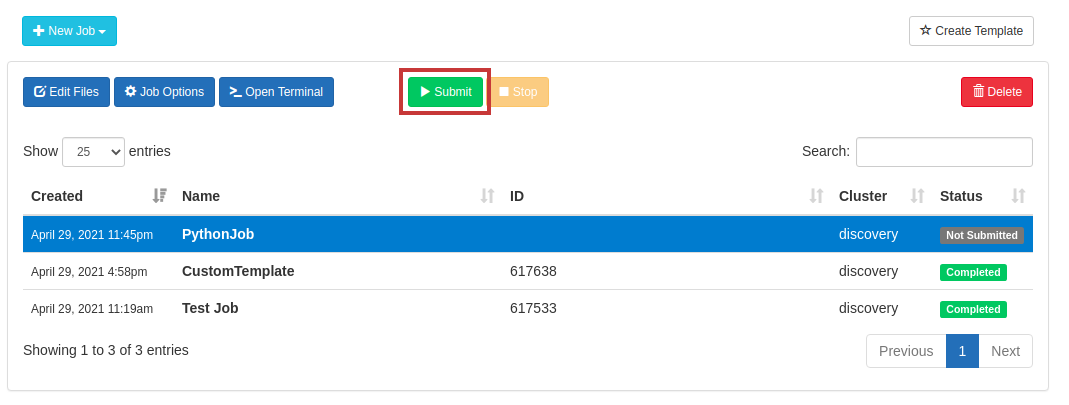
You will see a new job created in the Jobs page. Now, select the Submit button to launch the job.
Now, you will see the status changing from Not Submitted to Queued/Running. After the status changes to Completed, you can view the output maxFib.out under Folder Contents on the right pane.

Output(maxFib.out):
From Selected Job
To create a new job from the existing one, select New Job > From Selected Job.
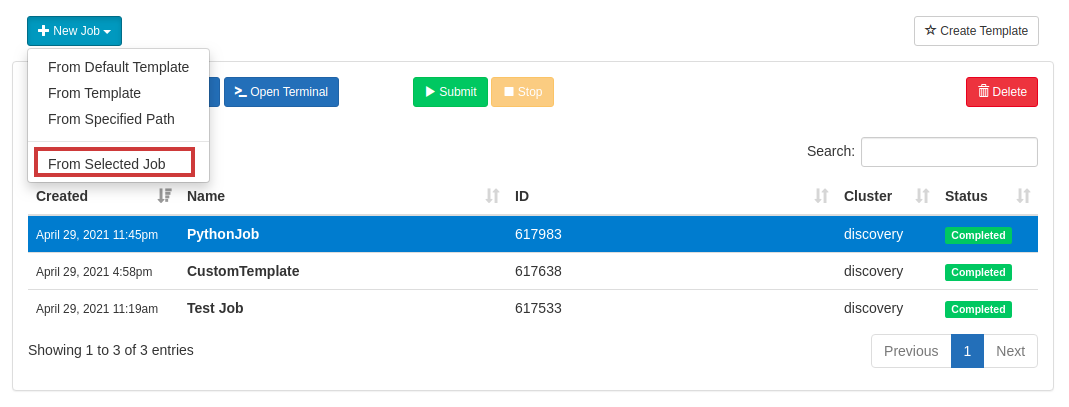
You will have a new job(copy) created in the Jobs page.
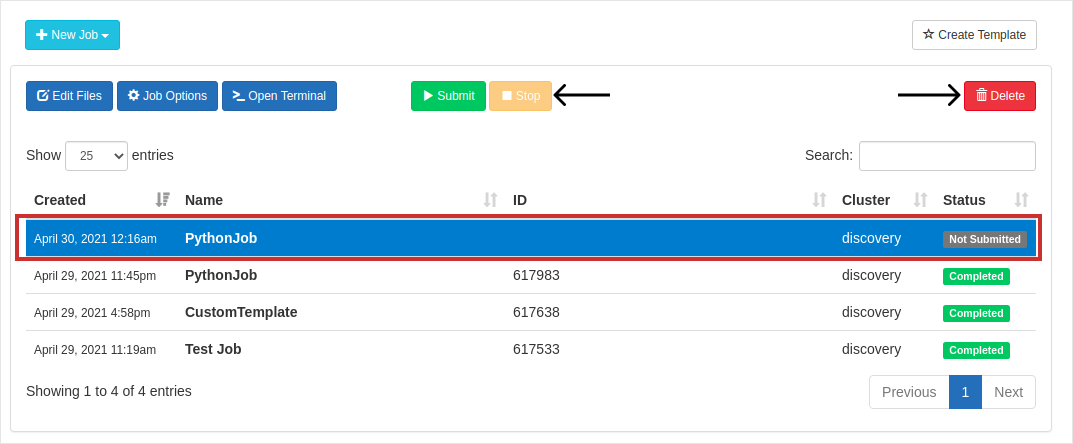
Note
You can also use the buttons Stop, Delete to stop a running job and delete the selected job respectively